Search
Close this search box.
Search

User Guide

Setting up a member (company) profile

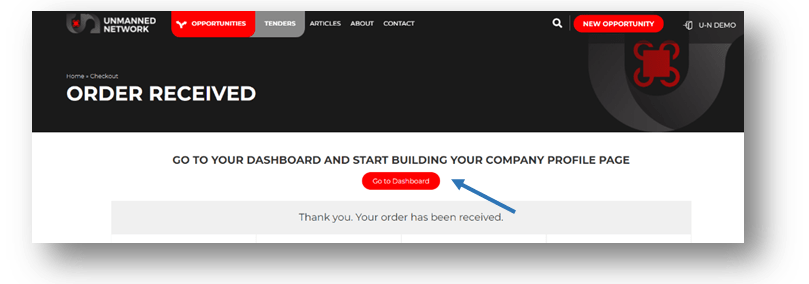
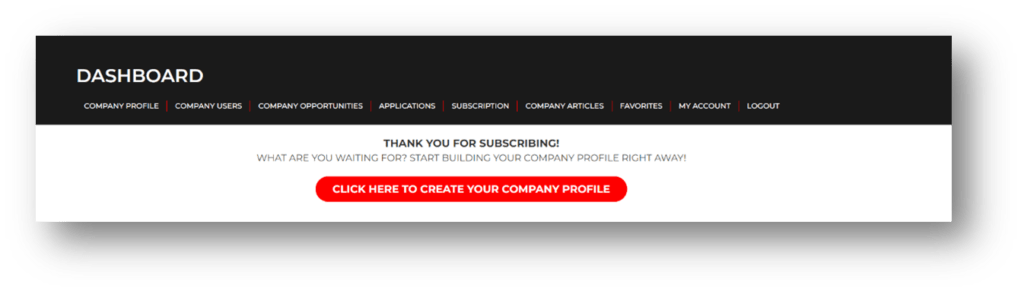
Upon initial login after signing up to the Unmanned Network click on Go to Dashboard:

go to dashboard

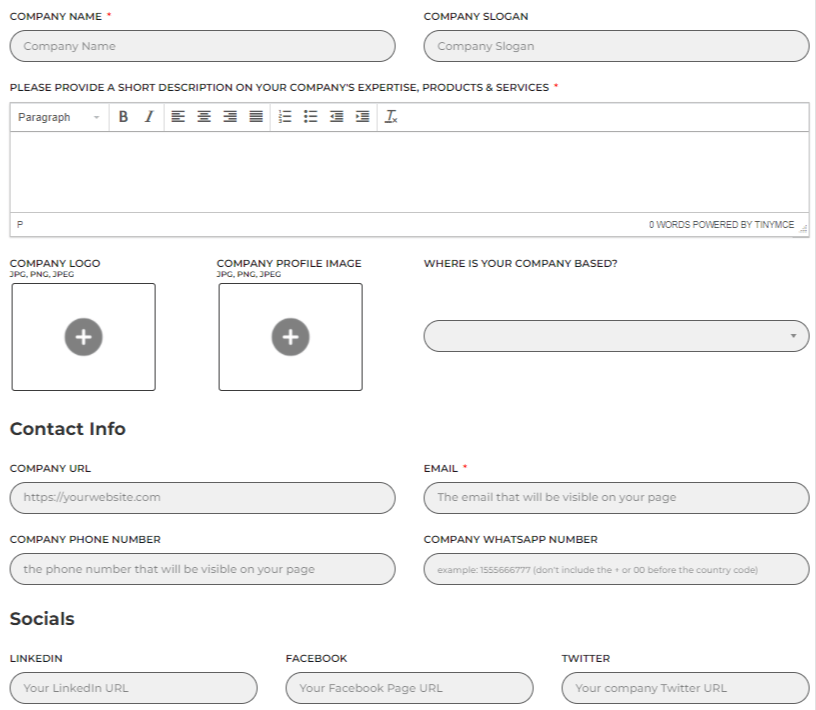
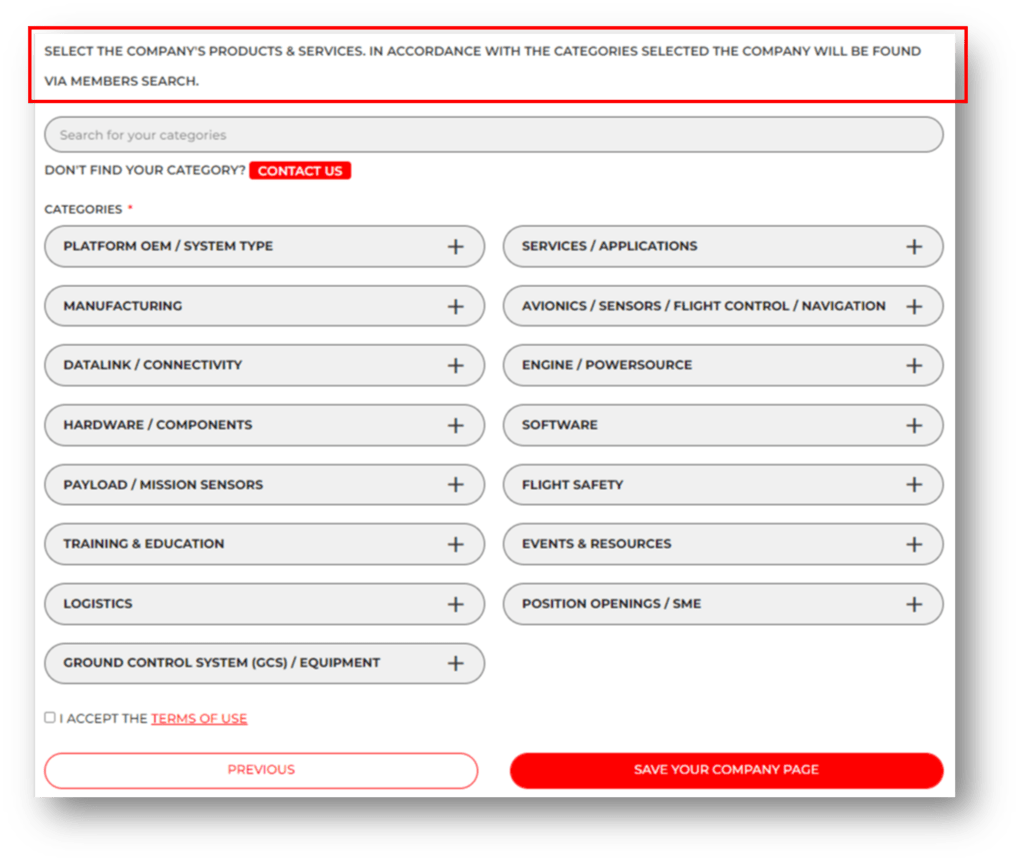
You will then be directed to the Company Profile Set-up page:

Guidelines & useful tips – Member (Company) Profile

  • Mandatory fields:
    • Company Name, Short Description, Email, Categories Selection
  • Short description:
    • Provide a short description on your company’s expertise, products & services.
    • No need for a long brief as upon interest users will be redirected to the company’s official website.
  • Company Logo:
    • Upload your company’s logo to be viewed alongside the profile.
    • Accepted files: JPG, PNG, JPEG.
  • Company Profile Image:
    • Upload an accompanying image for the profile such as a leading product / activity / event etc.
    • Accepted files: JPG, PNG, JPEG.
  • Where is your company based?
    • Choose the country in which the company resides.
    • Multiple countries can be chosen.
  • Contact Info:
    • Company URL – Link to the company’s website.
    • Email – The company’s contact email (i.e., Info / contact@).
    • Company Phone Number – Call in number.
    • Company WhatsApp Number – Contact via WhatsApp.
  • Social:
    • Link to the company’s social network pages: LinkedIn, Facebook, Twitter.
  • Company categories:
    • Select the company’s products & services.
    • Remember: In accordance with the categories selected here the company will be found via members (companies) search.
    • Click on any category to access the dropdown menu to the main category’s secondary options.
  • If a member (company) profile was not setup and skipped, you will be reminded to do so upon following logins:
  • Editing a member (company) profile can be accessed via the company profile:
    • Click on your displayed name on the top right-hand side.
    • Or via the Dashboard.
    • Upon accessing the profile click on the Edit button above the company’s categories.

Setting up your personal profile / account

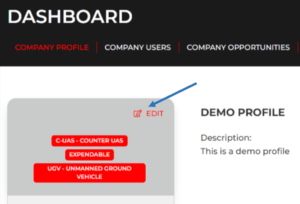
  • After setting up the member (company) profile you will be redirected to your personal profile / account.

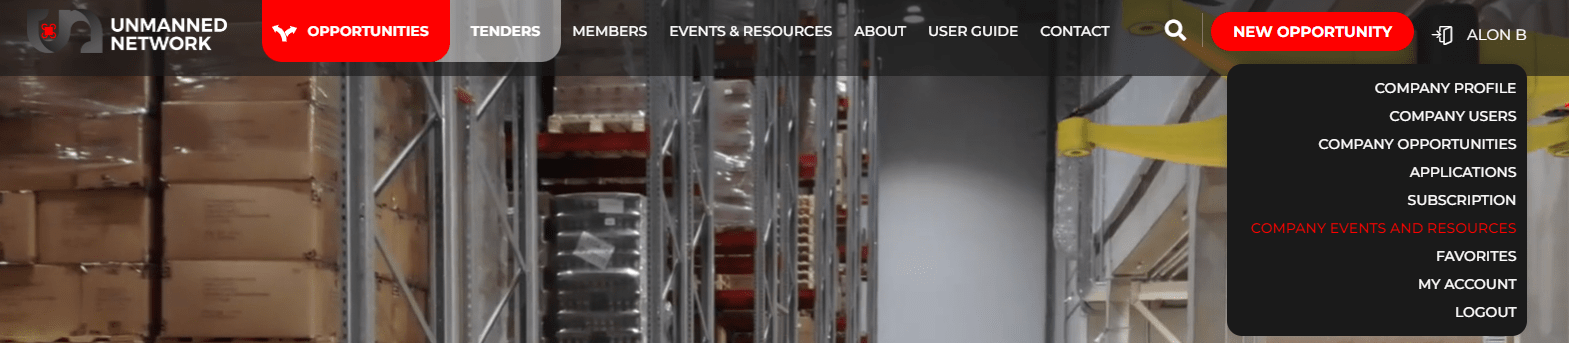
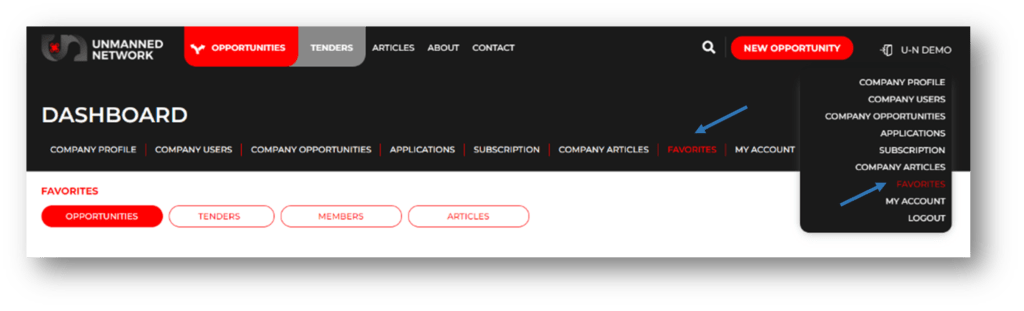
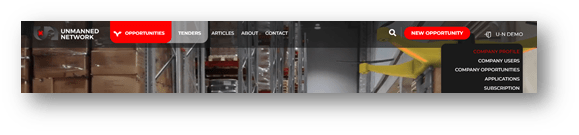
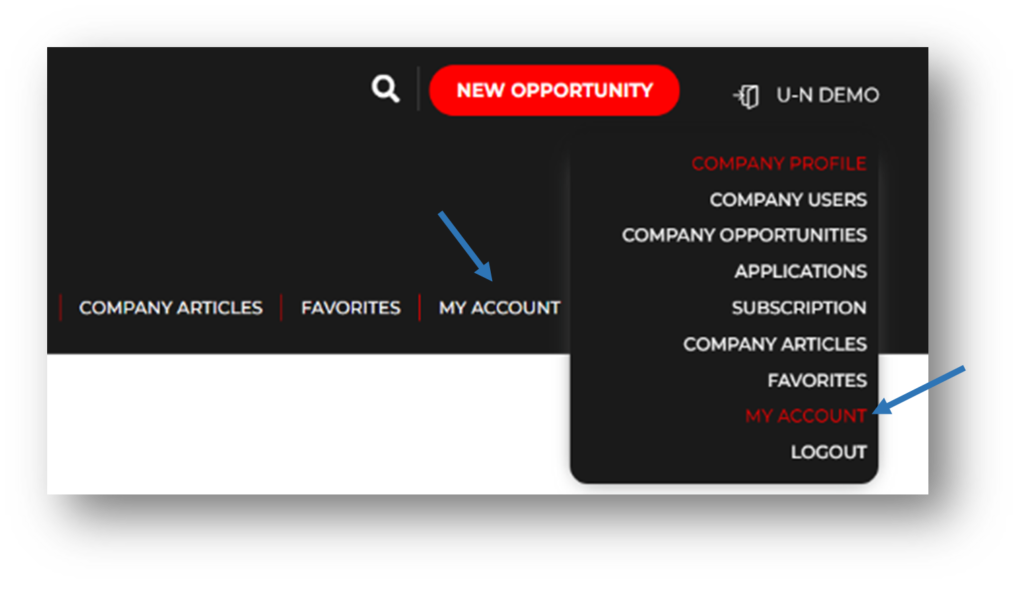
    Accessing / editing your personal profile / account can also be accessed via:

    • Click on your displayed name on the top right-hand side.
    • Or via the Dashboard.
    • Your account can also be accessed via Company Users (on the Dashboard) > Edit icon on your personal user.

Guidelines & useful tips – My Account

    • Mandatory fields:
      • Display Name, Email.
    • Display Name:
      • Display name is the name that would be displayed on your profile and sent upon applying for an opportunity.
    • Email:
      • Your contact email that will be sent upon applying for an opportunity.
    • Phone Number:
      • Your phone number that will be sent upon applying for an opportunity.
    • First Name / Last Name:
      • No significance, for your internal use only.
    • Password / Confirm Password:
      • Setting up your personal login password.
    • Profile Image:
      • For internal use only within your company’s other users.
    • Country:
      • Your country of current professional residence.

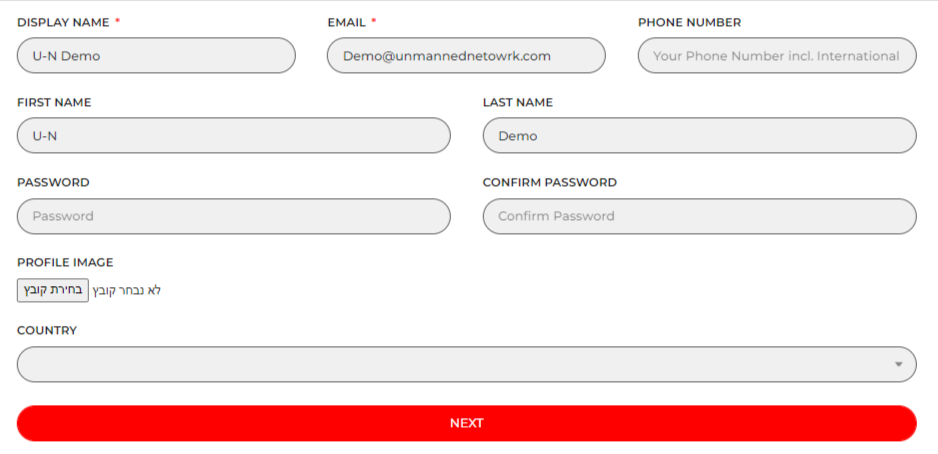
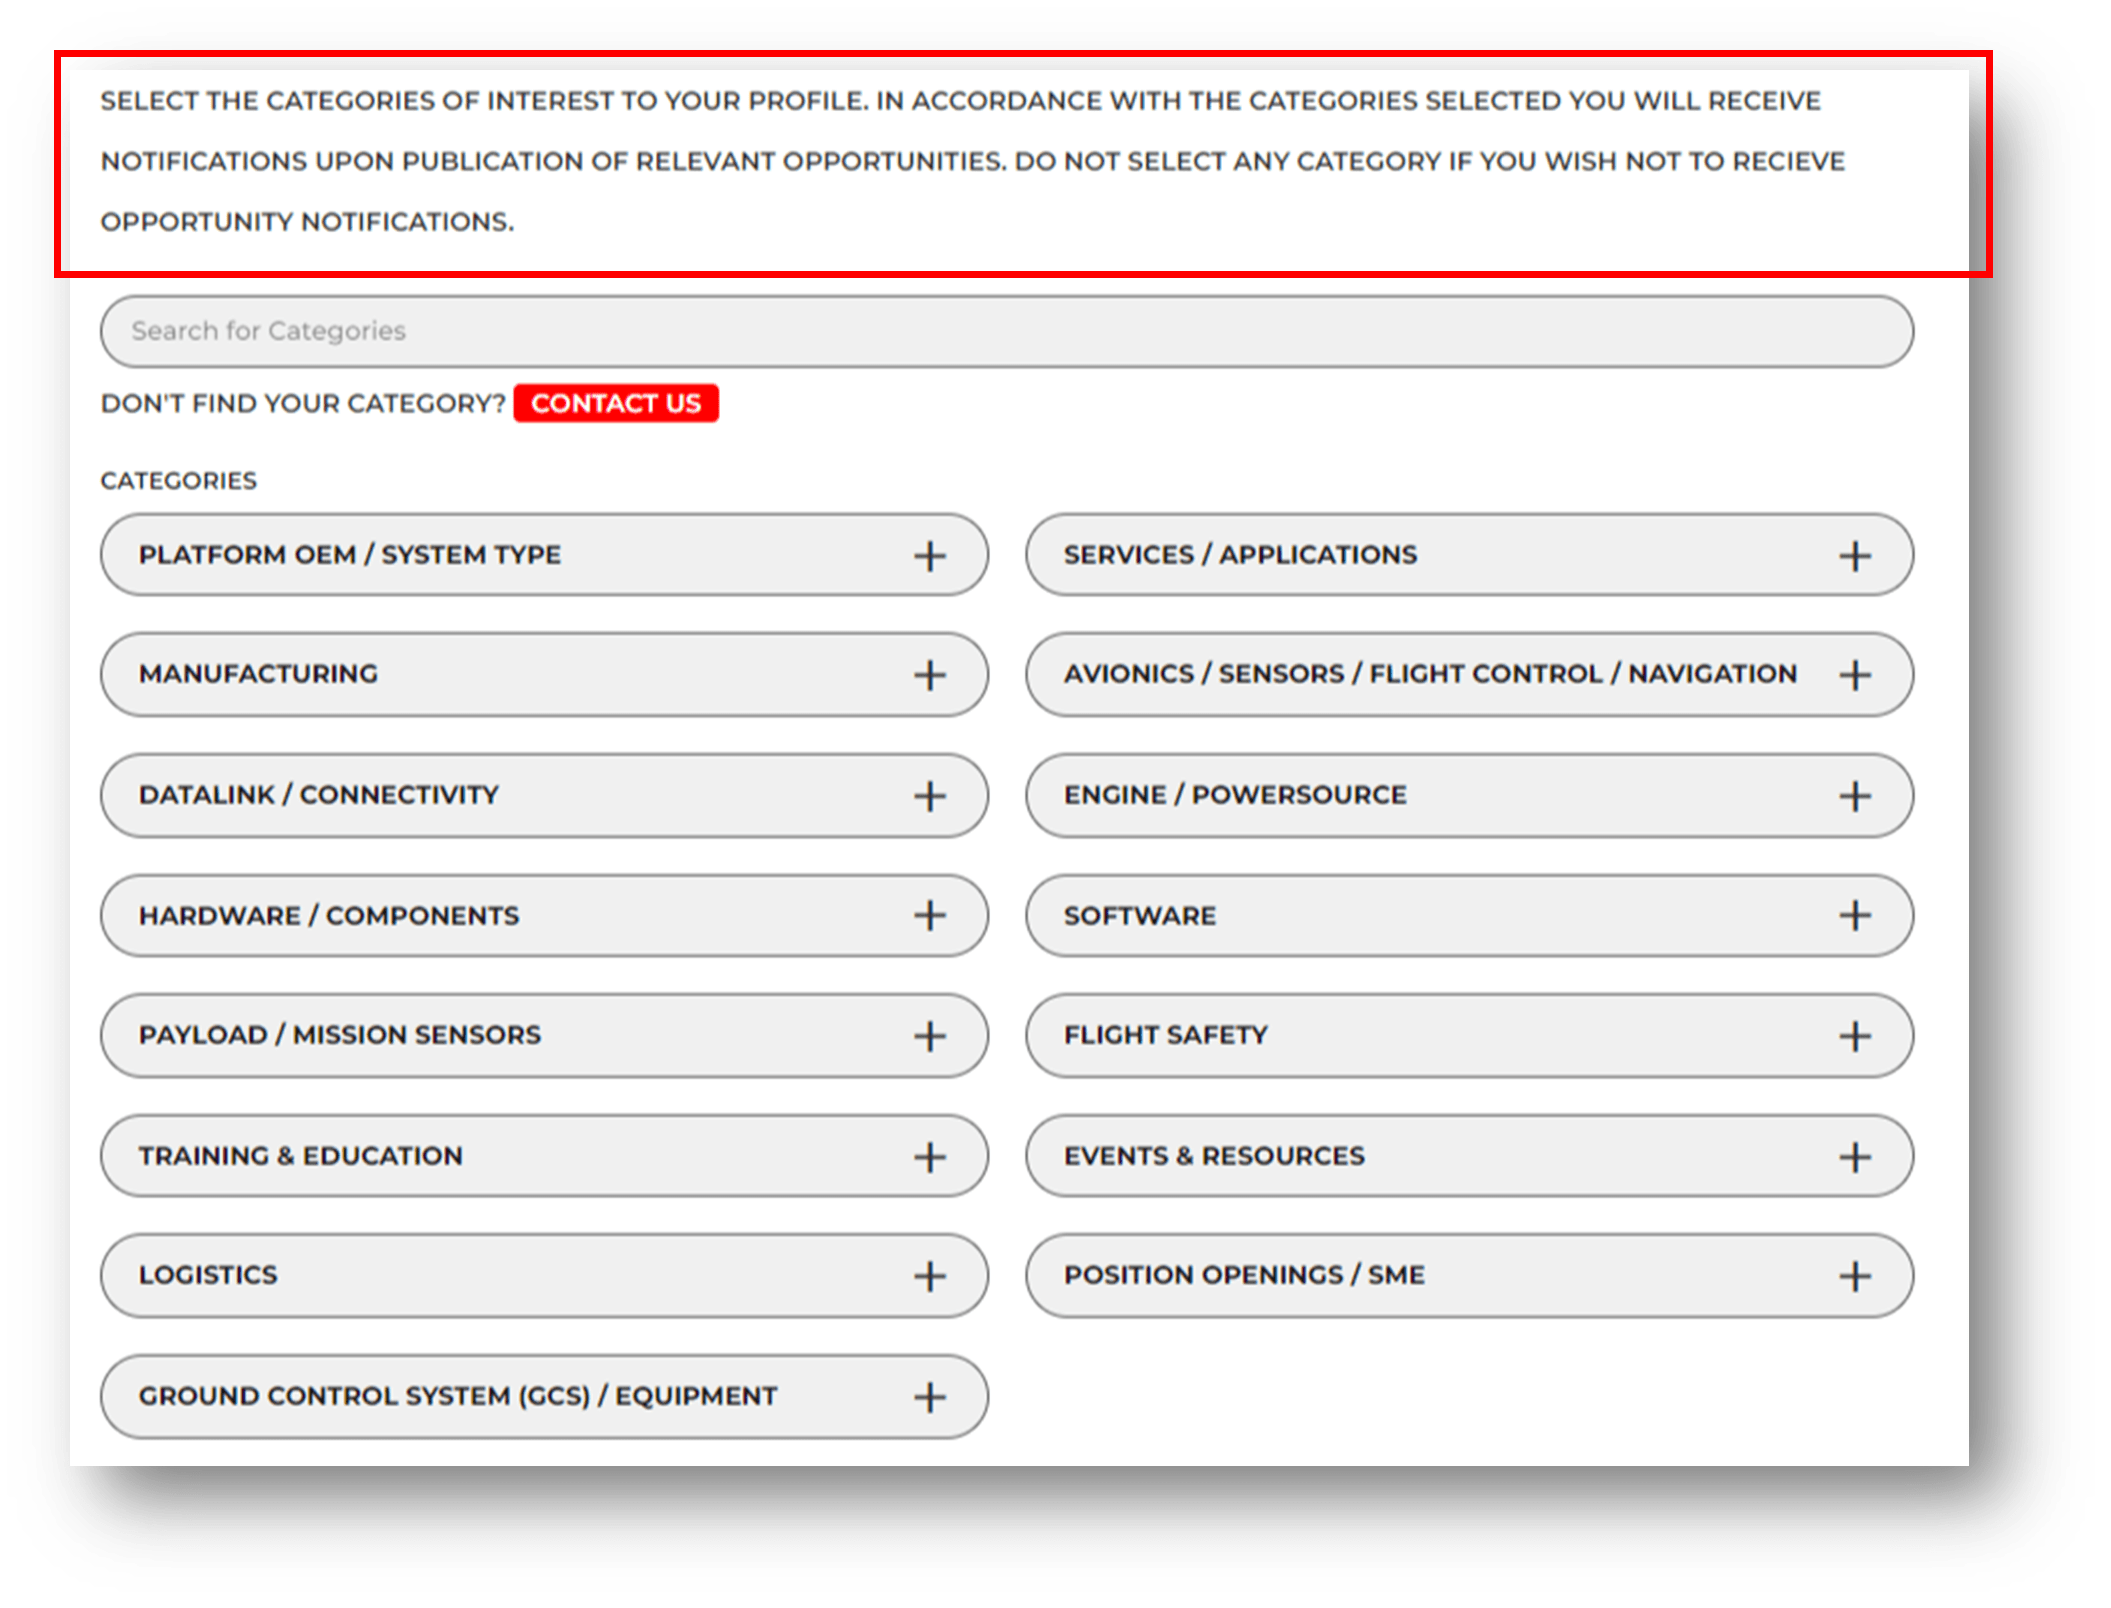
Personal (My Account) Categories:

  • Select the categories that are of interest to you.
  • Remember: In Accordance with the categories selected you will receive notifications upon publication of relevant opportunities and tenders.
  • Do not select any category if you wish not to receive opportunity / tender notifications.

Post an opportunity

  • What is an opportunity? 
    • An opportunity is any requirement your company obtains and / or yourself as an individual.
    • The opportunity can be for any subject / function within your organization: Business Development & Marketing, Procurement & Buyers, Engineering, Manufacturing, Logistics, Training, Human Resource, Legal & more.
    • An opportunity is also any content you wish to promote such as recorded webinars & podcasts.
  • To create a new opportunity simply click on the ‘New Opportunity’ button on the site’s header or on the ‘Create New Opportunity’ under Company opportunities within the dashboard.

Guidelines & useful tips – My Account

  • Mandatory fields:
    • Opportunity Title, Opportunity Description, Opportunity Categories.
    • Although the other fields are not mandatory additional elaboration will assist in promoting the opportunity & attract the most relevant inquiries.
  • Opportunity Title:
    • Headline / title for the opportunity.
  • Opportunity Description:
    • Provide a description of the required opportunity.
    • The length of the description is up to you – anywhere from a short general sentence to an in-depth detailed description.
    • The description can include any requirements – technical, operational, HR related – you see fit.
  • General Link & General Link Title:
    • A link (URL) to any external source you see fit.
  • Featured Image:
    • An accompanying image to enhance the opportunity’s presentation.
    • Accepted files: JPG, PNG, JPEG.
  • Opportunity Document:
    • An accompanying document for the opportunity, i.e.,: Technical Specs, image.
    • Accepted files: JPG, JPEG, PDF, DOC, DOCX, XLS, SLSX.
  • Submission Date:
    • A deadline date with regards to the opportunity.
  • Opportunity Quantity:
    • A required quantity of the opportunity’s category (i.e., component).
  • Opportunity Budget:
    • A budget limit for the opportunity.
  • Budget Currency:
    • Choose the relevant currency if a budget limit is inserted.
  • Country:
    • Relevant country for the opportunity.
    • This is relevant if the opportunity is physically in a specific country, i.e., position opening, service etc.
    • Multiple countries can be chosen.
  • Links & Social URLs
    • If the opportunity is also posted on social networks, you can link them here.
  • Opportunities Categories:
    • Select the categories that are relevant to the opportunity.
    • Remember: In Accordance with the categories selected the opportunity will be found via opportunities search and notifications will be sent to relevant profiles (in accordance with the categories chosen under ‘My Account’).

Add users to the member (company) profile

  • To add additional users, in accordance with your membership type (advanced or premium) click the ‘Add Employee’ button within the Company Users tab.
  • Insert the initial login credentials for the additional user.
  • The additional user can change the initial credentials given within the ‘My Account’ form.

Publish Content - Events & Resources

  • To post content simply click on ‘Company Events & Resources’ within the dropdown menu and then ‘Upload New Content’.

Guidelines & useful tips – Events & Resources

  • Title:
    • Content Headline.
  • Featured Image:
    • An accompanying image to the article.
    • Accepted files: JPG, PNG, JPEG.
    • Adding in image will further enhance the content’s exposure as the image will be featured on its thumbnail.
  • Description:
    • Content / Text.
  • External Link & External Link Title:
    • Any external link you wish to add – source, video etc.

Favorites

  • Mark opportunities, tenders, member profiles & articles of interest.
  • Simply click on the favorite ‘star’ icon.
  • To view your favorite picks simply click on the ‘Favorites’ option within the drop-down menu or choose the favorites tab within the dashboard.

Table of Contents

Request your category